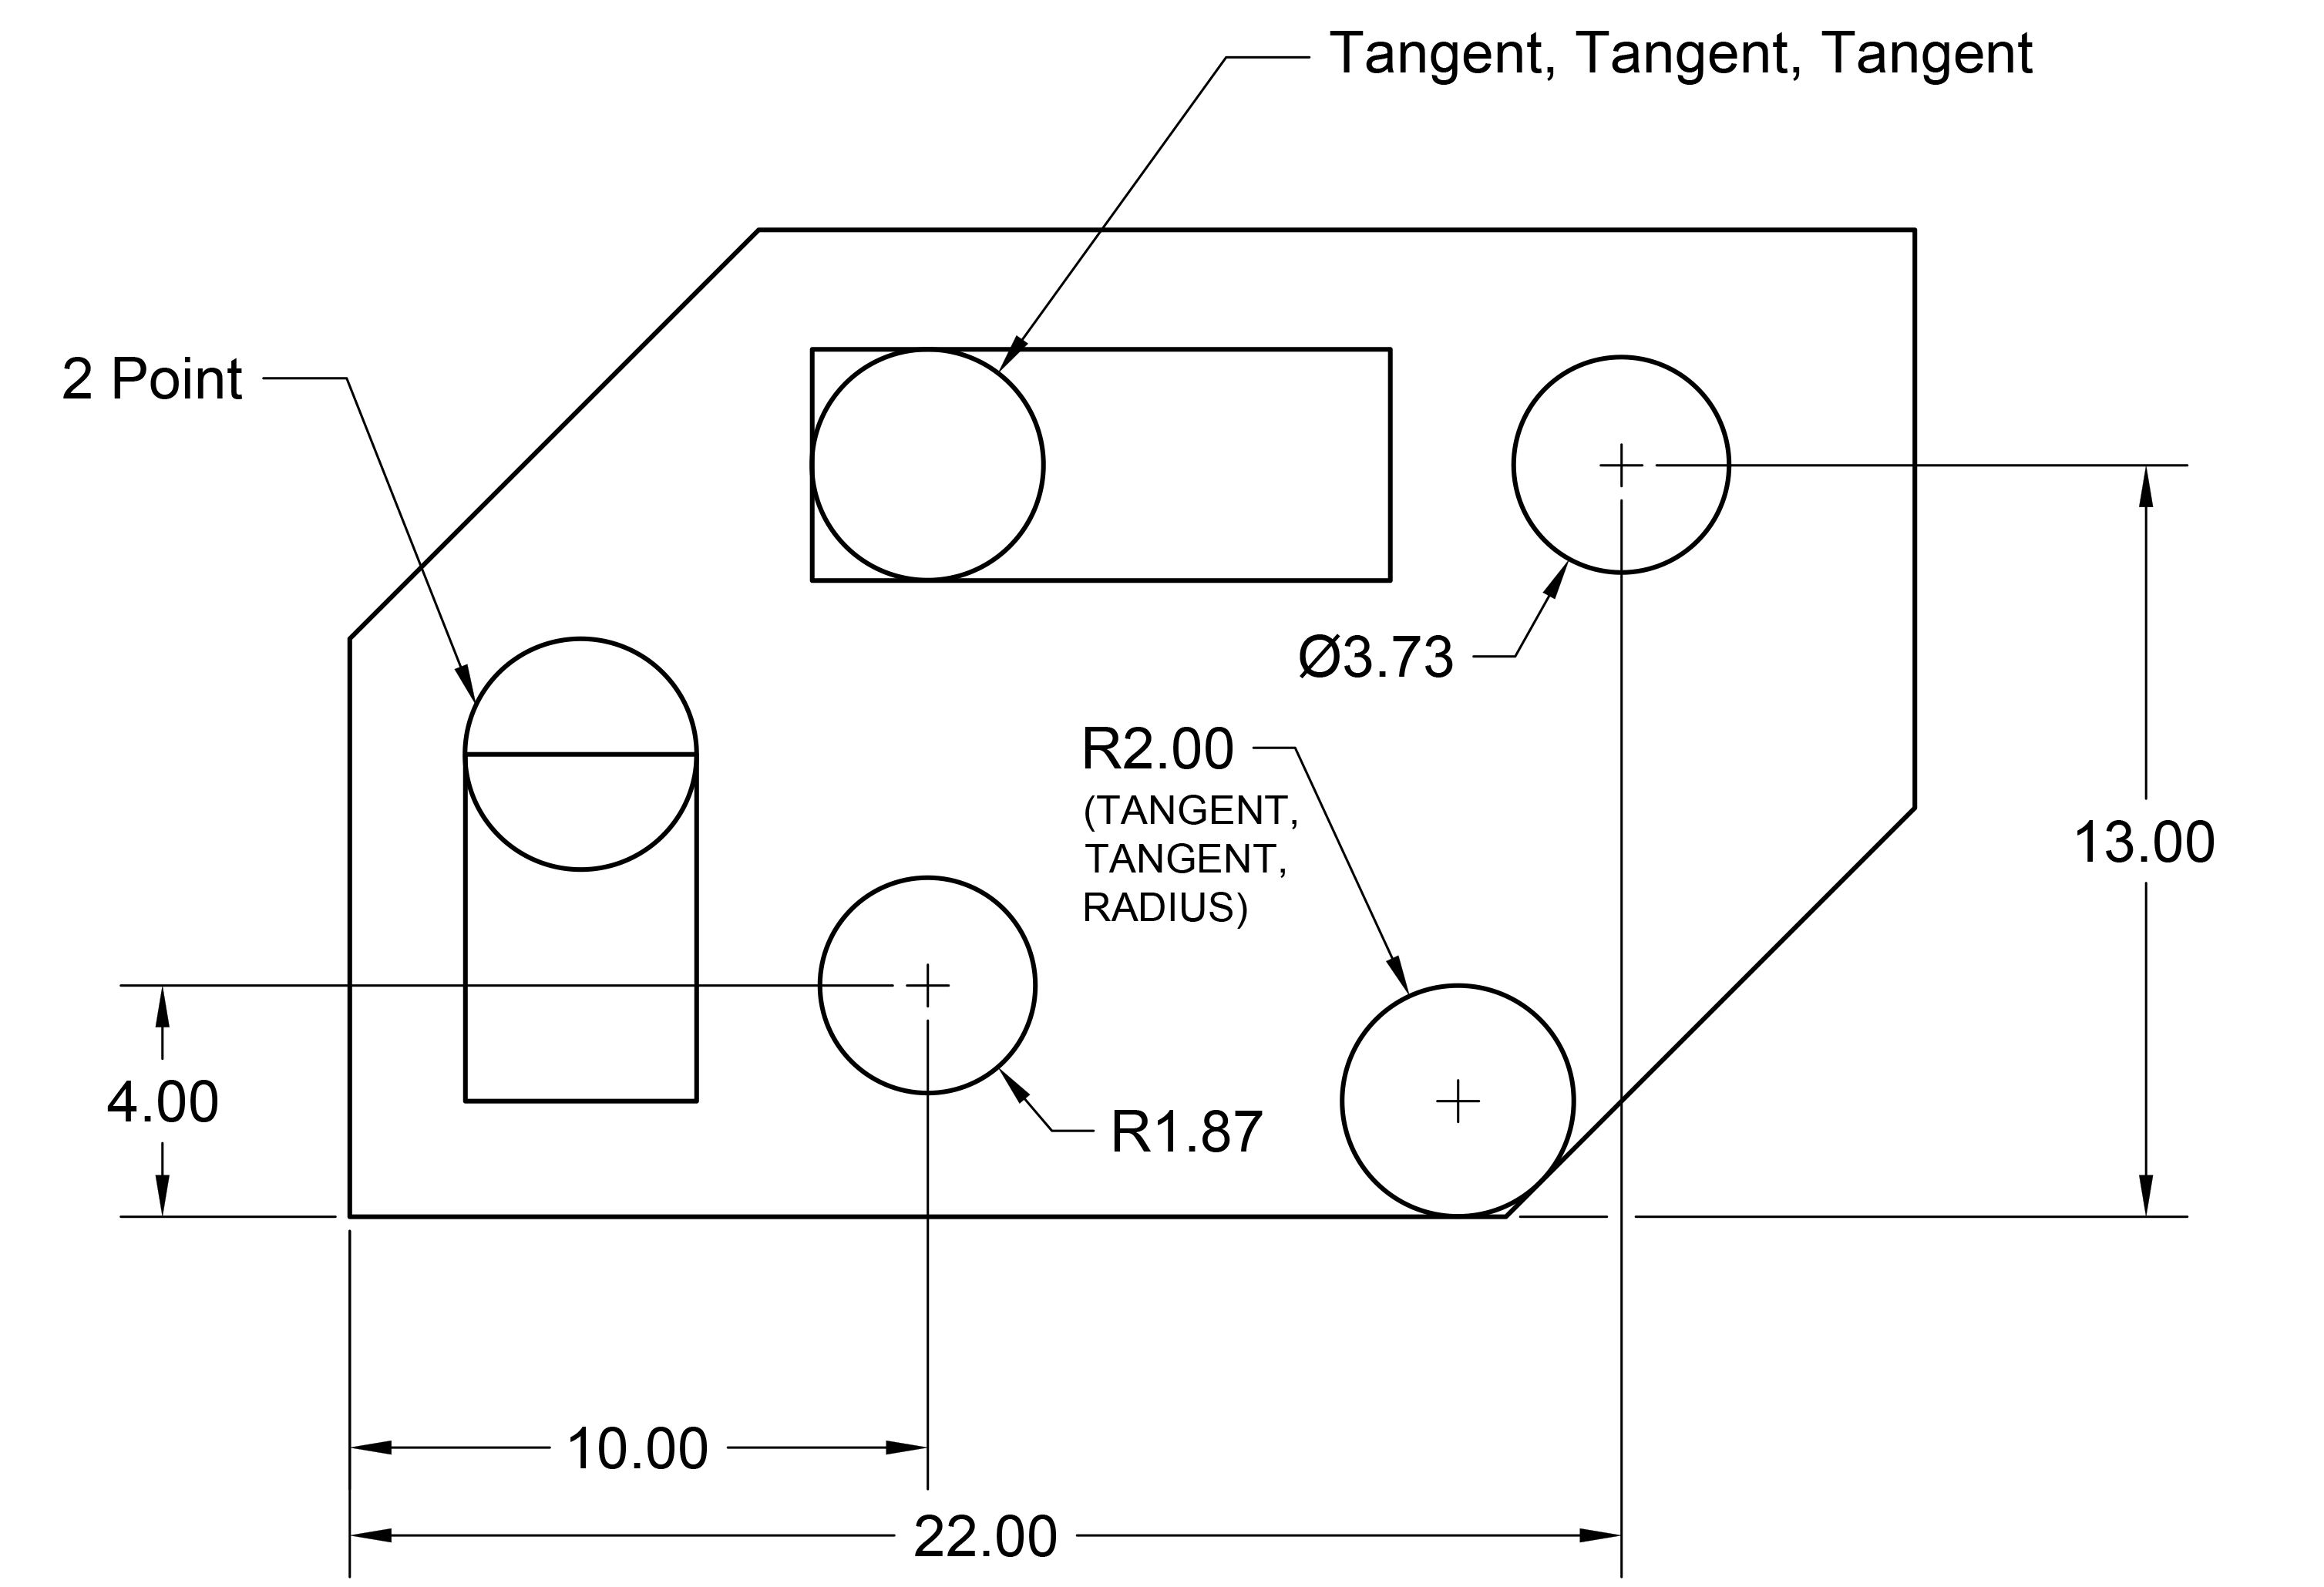
The Circle Command gives you several ways to make circles. In this exercise, you'll see how to draw circles using the Center, Radius method, 2-Point method, Tan, Tan, Radius method, and finally Tan, Tan, Tan.
This exercise is excerpted from Noble Desktop’s past AutoCAD training materials and is compatible with Photoshop updates through 2020. To learn current skills in AutoCAD, check out AutoCAD Bootcamp and AutoCAD classes in NYC and live online.
Note: These materials are provided to give prospective students a sense of how we structure our class exercises and supplementary materials. During the course, you will get access to the accompanying class files, live instructor demonstrations, and hands-on instruction.
Topics covered in this AutoCAD tutorial:
Using the Circle Commands
Exercise Preview
Exercise Overview
The Circle Command gives you several ways to make circles. In this exercise, you’ll see how to draw circles using the Center, Radius method, 2-Point method, Tan, Tan, Radius method, and finally Tan, Tan, Tan.
The Circle Command
To draw a circle, in the top Ribbon panel click on the Circle tool
 and start the Circle Command.
Center, Radius is the default method for the circle tool. For our first circle, define the center point by typing in 22,13. (You could also click on a point to specify the center point.)
After the center point has been set, the Diameter option will appear in the Command Line. Press D then Enter to choose the Diameter option.
Type in a diameter of 3.73.
Press Enter to repeat the Circle Command.
Type in the center point of 10,4.
The radius of the last circle will appear in the Command Line inside brackets. Press Enter to use the radius from the previous circle (
<1.87>).Press Enter to repeat the Circle Command.
In the Command Line, click on 2P to select the 2 Point method.
NOTE: With the 2 Point (2P) method, you can click or enter two points that will establish a diameter for the circle. With the 3 Point (3P) method, click or enter three points to create a circle that will touch all three points.
To draw the circle that sits at the top of the left rectangle, you’ll need to specify the two diameter points so that the diameter of the circle matches the upper edge of the rectangle. Align the cursor with the top-left corner so that you see a green square appear, then click to specify the first point.
Move the cursor to snap to the top-right corner of the rectangle. This should finish drawing a circle that matches the diameter of the rectangle.
To create the circle in the bottom right of the shape, press Enter to repeat the Circle Command.
You can also use tangents to define a circle. A tangent is the point at which a circle or curve touches another object. With the Tan, Tan, Radius (Ttr) method, click on any two objects for the circle to be touching, and then enter a radius.
Let’s see how this drawing method works. In the Ribbon menu, click on the arrow underneath the Circle tool to choose Tan, Tan, Radius (Ttr).
NOTE: You can see these options in the Command Line, the Draw Menu, or the drop down Circle Command menu in the Draw Panel on the Home Tab of the Ribbon.
Click the bottom and lower right edges to select the tangents for the circle as shown in the diagram. You will see the tangent snap symbol will appear when the cursor touches the lines. Press Enter to repeat the radius of <2> to create the circle.
With Tan, Tan, Tan, click on any three objects to create a circle that will touch all three objects. The Tan, Tan, Tan, option is only available in the Circle Command drop down menu in the ribbon, and not in the command line.