
Learn how to name ranges and restrict data entry in Microsoft Excel in order to create complex spreadsheets efficiently and accurately.
Named Ranges
Assign a name to a range of cells to make it easier to reference those ranges in calculations.
- Note: named ranges are always absolute cell references
Three methods exist to Name a range:
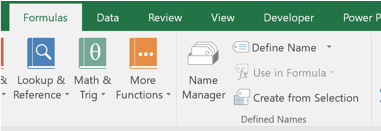
A) FORMULAS tab
- Highlight the cell range
- FORMULAS >> Defined Names group >> Define Name
- In the New Name Dialog box, type the name you would like to assign to the range
- Define the Scope: how accessible do you want the Named Range to be (one particular worksheet or the entire workbook?)

B) Right-click menu
- Highlight the cell range
- Right-click
- Define Name
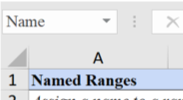
C) Name Box
- Highlight the cell range
- Click in the Name Box
- Type the new name
- Enter
Data Validation
- Restrict the type of data that can be entered into a cell
- Create a dropdown menu to make data entry quicker and more efficient
- Highlight cell range >> DATA >> Data Tools group >> Data Validation
Settings tab
- Establish the Validation Criteria for the validation
-
Allow: what type of data is permitted in the cell(s)
- “List” is used to create a dropdown
-
Allow: what type of data is permitted in the cell(s)
- Data: choose a designation for the data
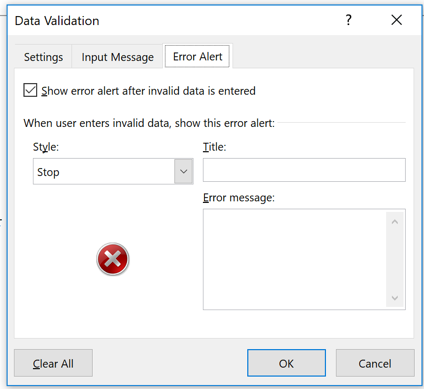
| Input Message Tab | Error Alert |
|---|---|
| Create and customize an optional tool tip message | Customize a message for invalid data |
| Input message is optional |
Three styles exist:
|

Learn More About Excel
Master Microsoft Excel through our suite of Microsoft Office classes in NYC and Excel training courses. An expert instructor will guide you through hands-on lessons that will turn you pro in no time!