
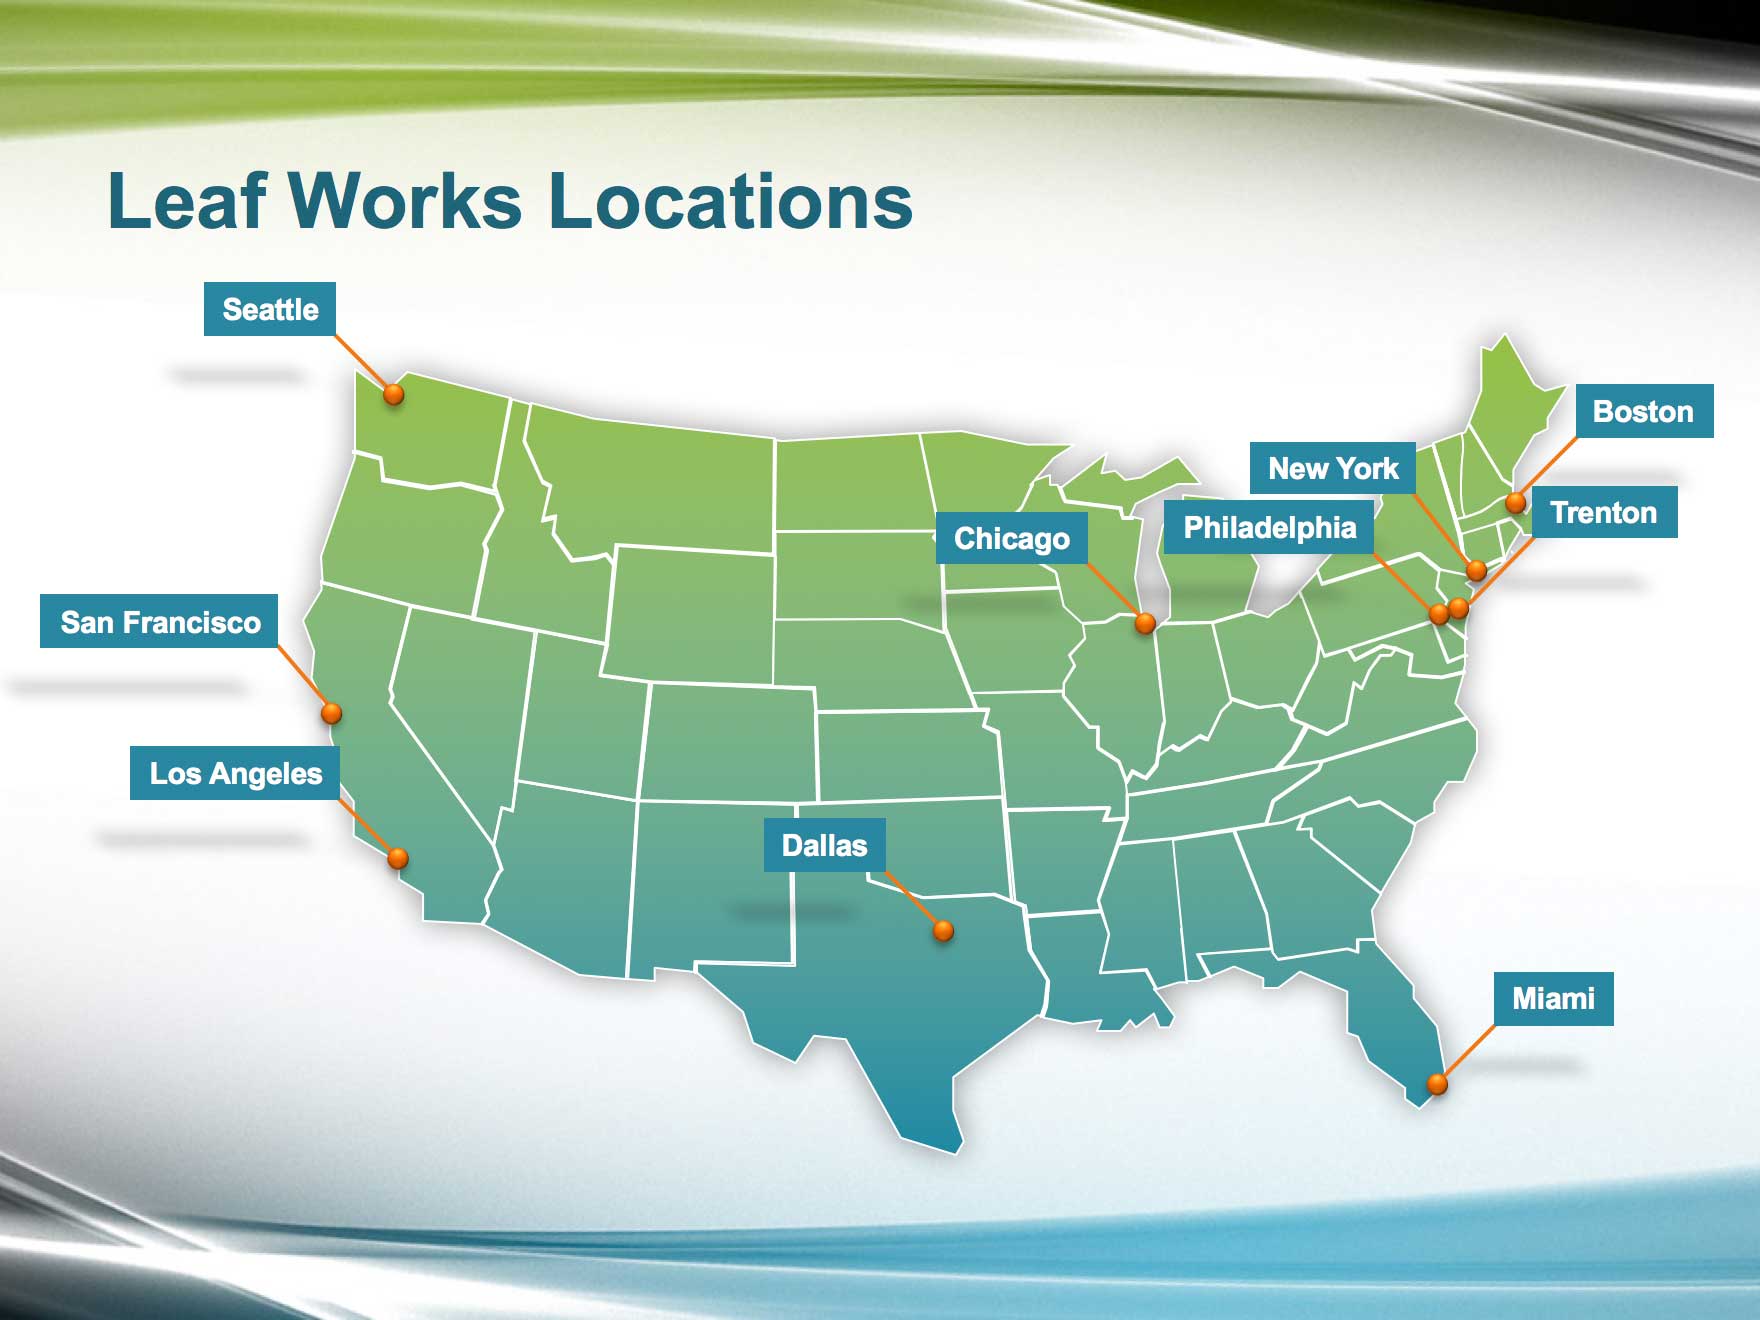
In this exercise, you'll format a map slide, adding a group of shapes to various US locations to point out the cities with a Leaf Works location. Don't worry if your geography is a little rusty—there are lots of screenshots for reference.
Getting Started
1. If you have any presentations open, in PowerPoint, go to File > Close to close them. You may have to close more than one.
2. Still in PowerPoint, go to File > Open to open the next project.
3. Under Open, click on On my Mac or This PC.
4. Navigate to the Desktop > Class Files > yourname-PowerPoint 2016 Class folder.
5. Double-click Map.pptx to open it.
6. In the Slides list on the left, scroll down and select the Leaf Works Model slide (Slide 12).
7. In the Home tab, click the arrow part of the New Slide button and choose Title Only.
8. In the title placeholder, type: Leaf Works Locations
9. Go to File > Open to open the presentation we'll take our map from.
10. Under Open, click on On my Mac or This PC.
11. Navigate to the Desktop > Class Files > yourname-PowerPoint 2016 Class folder.
12. Double-click Resources.pptx to open it.
The map in the Resources file is a vector map made out of drawing shapes that are editable in PowerPoint. We created it for you.
13. Click on the map to select it.
14. Copy it.
15. We're done with Resources.pptx, so close it. You should be back in Map.pptx.
16. Paste the map onto the Leaf Works Locations slide.
Applying a Gradient to the Map
Because our vector map is editable in PowerPoint, we can easily make it look nicer and more consistent with our presentation. Let's apply the lime green and turquoise gradient that we've used on the Title Master (and hence our title slide).
1. Right-click on the map and choose Size and Position.
2. Set Horizontal position to 1.72" and Vertical position to 1.89."
3. Near the top of the panel, click the Effects button.
4. Under Shadow, from the Presets menu, under Outer, choose Offset Center (the center option).
5. Set the following shadow values:
- Transparency: 60%
- Size: 100%
- Blur: 14 pt
- Angle: 0°
- Distance: 0 pt
6. Near the top of the panel, click the Fill & Line button.
7. Under Fill, choose Gradient fill.
8. Set Angle to 270°.
9. Click on the leftmost gradient stop.
10. Below that, click the Color menu and choose the sixth theme color, Turquoise, Accent 2.
11. We only want two color stops on this gradient. Select any extraneous gradient stops between the two endpoints and to the right of the gradient bar, and click the Minus (–) button (Mac) or the Remove gradient stop button (Windows) until you are left with two gradient stops.
12. Click on the rightmost gradient stop.
13. Click the Color menu and choose the fifth theme color, Lime, Accent 1.
City Markers: Creating the Label & Line
As shown in the exercise preview at the beginning of the exercise, we want to mark each Leaf Works location with a label, line, and circle combo. Let's start with the topmost location on the left: Seattle.
1. In the Home tab, click the Text Box button.
2. In the upper left corner, place the cursor to the left of Washington State and click the mouse to create a default-sized text box.
3. In the new text box, type: Seattle
4. Right-click on the new text box and choose Format Shape.
5. In the Format Shape panel, click on Text Options then click Textbox.
6. Check on Resize shape to fit text.
7. Make sure the Bottom margin is set to 0.05."
8. With the text box still selected, in the Home tab, set the following:
- Font Size: 12 pt
- Font Color: White, Background 1 (first theme color)
- Alignment: Align Right
- Shape Fill: Turquoise, Accent 2 (sixth theme color)
NOTE: Because this label is situated to the left of Seattle's location, we right-aligned the text so it's a tad closer to the city on the map. Later on, we will rotate some of the city markers, and we'll left-align their text to match the positioning.
9. We want to create a line that we'll position between the city label and the city's location on the map. At the bottom right of the window, click the Zoom In button as many times as needed to make the Washington State area bigger on-screen.
10. In the Insert tab, click the Shapes button, then the Line shape.
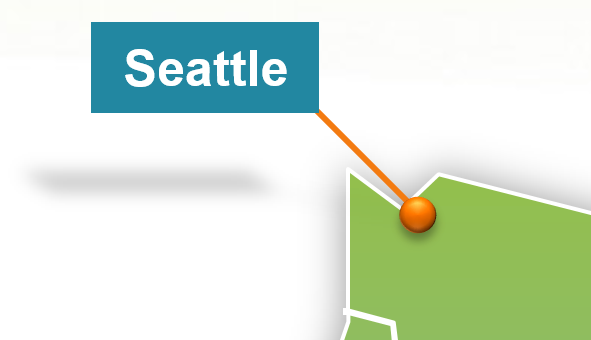
11. Drag to create a line from the bottom-right corner of the Seattle text box to roughly where Seattle is on the map:

12. With the line selected, in the Home tab, click the arrow part of the Shape Outline button, and from the Dashes menu choose the first option, Solid.
13. Right-click on the Seattle text box's bounding box and choose Bring to Front > Bring to Front.
City Markers: Creating the Circular "Pin"
Let's create a symbol that marks a city's position on the map. Design-wise, let's put a modern twist on the classic circular map "pin."
1. In the Insert tab, click the Shapes button, then the Oval shape.
2. Hold Shift and drag to create a new circle at the end of the line on the map. If it's not quite there, don't worry—you will exactly position it on the map later.
Instead of painstakingly formatting the shape one parameter at a time, let's use a Quick Style to apply a finished look.
3. With the circle selected, go to the right side of the Home tab, click the Quick Styles button, and choose Intense Effect, Orange - Accent 4 (the orange option in the bottom row).
If you recall, we used an Intense Effect earlier (on our turquoise custom table header for the 2016 sales data). Whether it's a gradient, a Quick Style effect, or a shape, reusing design elements and styles is a best practice for making your presentation look consistent throughout.
4. With the circle selected, in the (Shape) Format tab, in the Size section, set both Height and Width to 0.12."
City Markers: Shadows & Grouping
1. Use Shift-click to select the Seattle text box and the pointer line (at the bottom of the window, Zoom In or Zoom Out as needed).
2. Right-click on the text box or line and choose Group > Group.
3. Right-click on the group and choose Format Shape.
4. Near the top of the Format Shape panel, click the Effects button.
5. Choose Shadow, then Presets. Under Perspective, select the top-left option: Perspective Diagonal Upper Left (Mac) or Perspective: Upper Left (Windows).
6. Drag the circle to Seattle's location on the map, as shown below:
7. Drag the Seattle label group up and to the left of the circle.
8. Make sure that the circle object is in front of the pointer line. If it's not, Right-click on it and choose Bring to Front > Bring to Front.
9. Drag a selection box around the label group and the circle.
10. Right-click on any of those elements and choose Group > Group.
Adding the Rest of the Locations
1. Hold Option (Mac) or Ctrl (Windows) and drag to duplicate the Seattle group.
2. In the new text box, replace the text with: San Francisco
3. Drag the group so that the circle is in the approximate location of San Francisco, as shown in the map below (you'll use it for the other locations too):
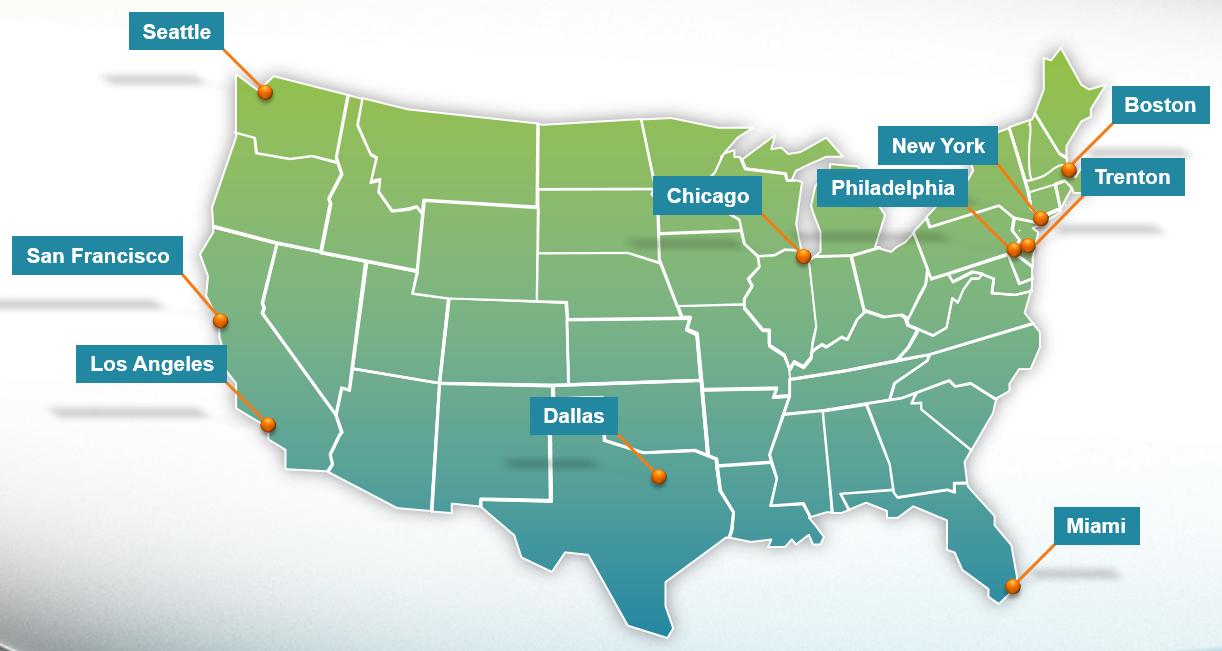
4. Repeat the process of duplicating and moving the city marker groups to create the rest of the locations:
- Los Angeles
- Chicago
- Dallas
- New York
- Philadelphia
- Boston
- Trenton
- Miami
NOTE: If your geography is fuzzy, you can consult the helpful map in the previous step for the positions for each city marker.
5. Some of the East Coast cities don't look good because they're covering or are too close to other markers on the map (assuming you did not adjust the lines). Select the Boston, Trenton, and Miami groups.
6. In the Home tab, click Arrange, then Rotate. Choose Flip Horizontal.
7. Still in the Home tab, click the Align Left button.
8. Move them around so that the lines once again point to their city's location.
When laying out a map, we generally don't want labels and lines to touch each other. It's OK if location markers overlap though.
9. Let's fine-tune the city labels. Drag the labels, lines, and/or location markers to reposition them, ungrouping and regrouping where necessary.
10. When you're finished cleaning up, save and close the file.
Master Microsoft Office
Microsoft Office is a suite of productivity tools that benefit not only individual users, but whole teams. Learn how to harness the full power of Office for your business. We offer the best Microsoft Office classes in NYC. Our expert instructors help students create engaging presentations, generate reports on the fly, automate tasks, and more! Sign up individually, or contact us about corporate training today: