
In this exercise, you'll work on a Quote slide. The content in the old presentation is in the form of a bullet slide. We don't want to keep that format because it is so common. Let's do something creative with it instead.

Getting Started
1. In PowerPoint, go to File > Open to open the next project.
2. Open Quote Slide.pptx.
3. If you don't already have Content.pptx open, go ahead and open that now.
4. In the Slides list, click on Slide 4. This is the quote we'll use in our new presentation.
Setting Up the Content
1. Go to the Quote Slide file. To switch windows:
- Mac: Go to Window > Quote Slide (or press Cmd–Tilde(~))
- Windows: In the View tab, click the Switch Windows button and choose Quote Slide.pptx (or press Alt-Tab).
2. Click on the What Is Coworking? slide (Slide 2). We do this so that when we add a new slide, it will go after this one.
3. Click on the Home tab if it's not already selected.
4. Click the arrow part of the New Slide button to show different slide templates.
5. From the list of slides, choose Blank.
6. Switch to the Insert tab and click the Text Box button.
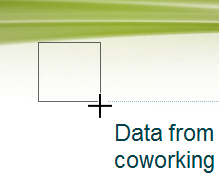
7. On the slide, drag the cursor to create a medium-sized text box:

8. In the (Shape) Format tab, on the right, set Height to 3.24" and Width to 6.86."
9. To get the quote from the Content.pptx presentation, do the instruction for your platform (last time we are giving instructions on how to switch windows!):
- Mac: Go to Window > Quote Slide (or press Cmd–Tilde(~))
- Windows: In the View tab, click the Switch Windows button and choose Quote Slide.pptx (or press Alt-Tab).
10. In Content.pptx, highlight the quote that starts with Data from... and ends with ...every major city.
11. Copy it.
12. Switch back to Quote Slide.pptx.
13. Do the instruction for your platform to paste the text:
- Mac: Go into Edit > Paste Special. In the dialog, choose Unformatted Text and click OK.
- Windows: Right-click on the second text box's bounding box and from the Paste Options, select Keep Text Only.
14. Click on the text box's bounding box so we can change the text formatting.
15. Align the text to the left. (In the Home tab, in the Paragraph section, click the Align Left button. Mac: You can also go to Format > Alignment > Align Left).
16. In the Font section, click the Increase Font Size button once to change the font size to 28.
17. With the bounding box still selected, click the Bold button to remove the bold formatting.
18. Click the arrow part of the Font Color button, and under the second theme color, choose Blue-Gray, Text 1, Darker 25% (second from bottom).
19. Let's center the box on the page. With the bounding box still selected, in the Home tab, in the Drawing section, click the Arrange button and go to Align > Align Center. Alternatively, Mac users can choose Arrange > Align or Distribute > Align Center.
20. While holding Option (Mac) or Ctrl (Windows), drag the leftmost center resizing handle; drag it to the right until only the words major city are on the fifth line.
NOTE: Holding Option (Mac) or Ctrl (Windows) while dragging equally resizes multiple sides of a box (two if dragging from an edge resizing handle and all four sides if dragging from a corner resizing handle).
Formatting Lines
Let's create horizontal dividers above and below the text.
1. In the Insert tab, click the Shapes button, and under Lines, select the first one, Line.
2. Starting above the top-left corner of the text box, hold Shift and drag right to create a horizontal line.
3. Click the Arrange button and go to Align > Align Center.
4. Let's create another line under the text box. While holding Option–Shift (Mac) or Ctrl-Shift (Windows), click on the line and drag a duplicate under the text box. (If a menu appeared when you released your mouse, select Copy Here.)
5. Select both lines.
6. In the (Shape) Format tab to the right next to Width, click on the down arrow a few times to try it out:

7. Notice that the line width is only decreasing on one side, making the line
off-center. Let's try a different method.
8. Get the lines back to normal by clicking the up arrow.
9. Right-click on one of the lines and select Group > Group.
10. Hold Option (Mac) or Ctrl (Windows) and drag the resize handle of either line left or right to adjust the size of the lines to match the length of the text box.
11. Use the example below to adjust the position of the lines:

12. Let's change the color of the lines. In the (Shape) Format tab, in the Shape Styles section, click the arrow part of the Shape Outline button (Mac) or (Windows) to reveal color options.
13. Select the fourth theme color, Dark Blue, Text 2. Looking suave!
Adding Credentials
1. In the Insert tab, click the Text Box button.
2. To the lower right of the quote, drag out a small text box, as shown below:

3. Add to the box:
- Jennifer Bane
- Actionable Study Group
4. Adjust the box size until it is big enough to hold all the text.
5. Align the text to the right. As a reminder: In the Home tab's Paragraph section, click the Align Right button. You can also hit Cmd–R (Mac) or Ctrl–R (Windows).
6. Click into the text box and add an endash (–) and a space before the name so that the text reads: – Jennifer Bane. To type an endash, press Option–Hyphen (Mac) or Alt–Number pad 0150 (Windows).
NOTE: You can also add an endash this way:
- Mac: Insert menu > Symbol > Punctuation > En Dash.
- Mac 2: Insert tab > Symbol > Punctuation > En Dash.
- Windows: Insert tab > Symbol > Subset: General Punctuation > En Dash.
7. Select Actionable Study Group.
8. In the Home tab, click the arrow part of the Text Fill button and choose the fifth theme color, Lime, Accent 1.
9. In the Home tab, click the Bold button to unbold the text.
10. Change the font size to 18 pt.
Adding Quotation Marks
Let's add some huge quotation marks.
1. On the top left of the slide, drag out a text box like the one shown below. Don't remember how to create a text box? In the Insert or Home tab, click the Text Box button.
2. Type a double quotation mark (").
3. Click on the bounding box so we can style it to our liking.
4. Make the font size 200.
5. In the Home tab, click the arrow part of the Font Color button and under the seventh theme color in the fourth row, select Green, Accent 3, Lighter 40%. (This is the last time we're going to give explicit instructions on how to change font color!)
6. Select the quotation mark text's bounding box and copy it.
7. Paste it!
8. Arrange the quotation marks as shown below:

The quotation mark is facing the wrong direction. Let's rotate it 180 degrees.
9. Slightly above the text box, notice the white circular arrow. It enables us to rotate the selected object.
10. Hold Shift and drag the white circular arrow to rotate the quotation mark 180°. The end quotation mark is now correct.
11. Drag the text box to position the quotation mark slightly below the Actionable Study Group text.
Creating a New Master on the Fly
You may realize that you have several slides with the same type of quote. Time to make a master slide out of the quote slide for consistency.
1. Select all the objects on the slide.
2. Copy them.
3. Go into the View tab, then click the Slide Master button.
4. In the Slides list, click on the third slide down (Title and Content).
5. In the Slide Master tab, near the far left, click the Insert Layout button, and the new master will be added as the fourth slide.
6. Delete the title placeholder that shows up on the new slide.
7. Paste to place all quote the objects on the slide.
8. Change the Quote to say Quote text...
9. Change – Jennifer Bane to – Source.
10. Change Actionable Study Group to Company.
11. In the Slides list, Right-click on the slide and choose Rename (Mac) or Rename Layout (Windows). Name it Quote Slide and press Return/Enter.
12. Close the Slide Master by clicking its button.
13. In the Slides list, click on the last slide of the presentation so the slide we're about to add will go after it.
14. In the Home tab, click on the arrow part of the New Slide button.
15. Choose the new Quote Slide template (third one in the top row).
16. Now try to edit the text on that slide. You can't do it!
Fixing the Master Slide by Replacing Text Boxes with Editable Placeholders
The slide's text is not editable because those were just text boxes on the master page, and what we need are placeholders. So we need to go back to the master and add placeholders instead. Along the way, we'll need to style the text in the placeholders to match the text boxes. We'll do so quickly and easily using the Format Painter, which is like copying and pasting styles.
1. Go into the View tab, then click the Slide Master button.
2. In the Quote Slide master, click on the text box that says: Quote text...
3. In order to create a placeholder that's the same size as the text box, we need to see its dimensions. Right-click on the bounding box and choose Size and Position.
4. On the right, note the Width, Height, Horizontal position, and Vertical position. In real life, you would write these down. But for now we know they are around: Height: 3.01" Width: 6.3" Horizontal position: 1.85" Vertical position: 2.19"
5. In the Slide Master tab, click the arrow part of the Insert Placeholder button, and choose Text.
6. Draw a small box above the quote text box. It will be filled with Click to edit Master text styles, which indicates it's a placeholder.
7. Delete all the text from the placeholder.
8. There is still that pesky bullet sitting there. Right-click on it and choose Bullets then None.
9. Into the new placeholder, type: Quotation...
To copy the exact text formatting from the quotation in the text box to the word Quotation in the placeholder, we will use the Format Painter.
10. Place the cursor into any of the text in the main quotation (Quote text...).
11. Go to the Home tab, then near the far left, click Format (Mac) or Format Painter (Windows). The cursor will change to have a paintbrush next to it.
12. Click and drag with the paintbrush over the text Quotation... That takes care of the text formatting. One more thing.
13. In the Format Shape panel on the right, click on Text Options (near the top), then the Textbox button.
14. Under Vertical alignment, choose Middle.
15. Now we can delete the original text box with the Quote text... quotation. Go ahead and delete the big quote in the middle.
16. Right-click on the new Quotation... box and choose Size and Position.
17. Put in the following values (which are from the box we just deleted):
- Height: 3.01"
- Width: 6.3"
- Horizontal position: 1.85"
- Vertical position: 2.19"
18. Now let's test it out. Close the Slide Master (in the Slide Master tab).
19. Look at the quote slide you created that is not editable. Notice that the quote box is gone, but the new placeholder is also missing.
This is an essential thing to know about PowerPoint. When you add a new element to a master slide, it does not show up on existing slides. To get it to appear, we need to reapply the slide's layout. Let's do that next.
20. In the list of slides on the left, make sure the Quotation slide is selected.
21. In the Home tab, in the Slides section, click the Layout button.
22. Click on the Quote Slide template.
23. Hey, the new quote placeholder is now there, and editable. Type in a quote!
24. For more practice, let's create two more placeholders for the quote's attribution and the company name. Go back into the Slide Master via the View tab.
25. In the Slide Master tab, click the arrow part of the Insert Placeholder button, and choose Text.
26. Draw a small box above the Source placeholder.
27. Delete all the text from the placeholder.
28. Right-click on the pesky bullet that's still there. Choose Bullets then None.
29. Into the new placeholder, type: – Attribution
30. To copy the exact text formatting from the – Source text box to the new placeholder's word – Attribution, we will use the Format Painter. Place the cursor in the – Source text.
31. Go to the Home tab, then click Format (Mac) or Format Painter (Windows) to get the paintbrush cursor.
32. Click and drag with the paintbrush over the text – Attribution. Great.
33. Align the text in that box to the right.
Now let's create a separate box for the company name (we have to do this because PowerPoint will only let us use one text style per placeholder box).
34. Draw a small text placeholder below the – Attribution placeholder. It will be filled with Click to edit Master text styles.
35. Delete all the text from the placeholder.
36. Right-click on the pesky bullet that's still there. Choose Bullets then None.
37. Into the new placeholder, type: Company Name
38. To copy the exact text formatting from the old text box to the new placeholder, we will use the Format Painter. Place the cursor in the Company text.
39. Go to the Home tab, then click Format (Mac) or Format Painter (Windows) to get the paintbrush cursor.
40. Click and drag with the paintbrush over the text Company Name.
41. Align the text in that box to the right.
42. Resize the two placeholders you just created to be snug around the text (but leave plenty of space on the left side in case the name typed into the box is long).
43. Now drag each of those placeholders right over the old text boxes. Move them by eye until they line up.
Deleting Objects That Are Obscured by Other Objects
The new placeholders are covering up the older group of text boxes, so how do we get rid of those two boxes? There are different solutions on Mac and Windows, so do the instructions for your platform.
Mac Users Only: The Reorder Objects Feature
Let us introduce you to the Reorder Objects feature, a nifty 3D tool that allows you to move and reorder several layers all at once!
1. Right-click on the bounding box of any object on the page.
2. Choose Reorder Objects. You will see a series of 3D panes that illustrate how the objects on your Quote Master are ordered.
3. Find the pane that has – Source and Company on it (probably around the sixth from the right).
4. Drag that pane to the right so it is the first pane.
5. Click OK to exit Reorder Objects.
6. Click off any boxes that might be selected.
7. To delete the – Source and Company text boxes, click on the group's bounding box and press the Delete key.
Windows Users Only: Using the Selection Pane
Let us introduce you to the Selection Pane, which allows you to rename and reorder the objects on your slide!
1. In the Home tab's Editing section on the far right, click the Select button and from the menu choose Selection Pane.
2. In the Selection Pane that appears on the right, find the two Group headings. These numbers differ between trials.
3. Click on the Group that has two TextBox objects nested inside. (It's probably on top of the other group, which contains the two dotted lines.)
4. We want to delete this, but let's first learn how we can rename objects on the slide. Double–click on the selected word Group, and the name will become editable.
5. Delete all the text, replace it with: Source & Company group, and press Enter.
TIP: Renaming objects in the Selection Pane is very handy when you plan on animating a slide with a lot of objects on it. If you do the final bonus exercise at the end of the book, you'll see that objects in PowerPoint's list of animations have names such as Rectangle. Renaming objects before animating can save you time in the long run so you know exactly what you're animating.
6. With Source & Company group still selected, press the Backspace key to delete the entire group.
Finishing Up
1. Close the Slide Master by clicking its button.
2. In the list of slides on the left, make sure the Quotation slide is still selected.
3. In the Home tab, in the Slides section, click the Layout button.
4. Click on the Quote Slide template.
5. Now enter some text into the attribution and company name placeholders.
6. Congrats on creating a new master. You can save and close the file now.
Master Microsoft Office
We offer the best Microsoft Office training in NYC. Learn how to create engaging presentations, generate reports on the fly, automate tasks, and more! Our expert instructors guide students of all levels through step-by-step projects with real-world applications. Sign up individually, or contact us about corporate training today: