
In this exercise, we're going to create and edit two picture slides: a 1-column picture slide and a 2-column picture slide.

Photo courtesy of istockphoto, © ShutterWorx, Photo #21172829
Getting Started
1. If you have any presentations open, in PowerPoint, go to File > Close to close them. You may have to close more than one.
2. Still in PowerPoint, go to File > Open to open the next project.
3. Under Open click On my Mac (Mac) or This PC (Windows).
4. Navigate to the Desktop > Class Files > yourname-PowerPoint 2016 Class folder.
5. Double–click Picture Slides.pptx to open it.
Creating a 1-Picture Slide
1. In the Slides list, click on Slide 4 to add our 1-picture slide after it.
2. In the Home tab, click the arrow part of the New Slide button.
3. From the menu, choose Title and Content.
4. On the new slide, click into the title placeholder and type: Leaf Works Locations
5. In the center of the content placeholder, click on the Pictures icon.
![]()
6. Navigate to the Desktop > Class Files > yourname-PowerPoint 2016 Class > Source > Photos folder.
7. Double–click hallway-office-iStock-17624682-copyright-MatejPribelsky.jpg.
8. The image shrank the size of the content placeholder. The placeholder was the same width as the heading above, but now the photo is narrower. We did not want this to happen, so we'll need to resize the image frame. Pull out the picture's left and right sides until an orange guide appears to indicate that you're aligned with the heading above. Don't worry that you're distorting the image, you'll fix that next.
Cropping Images to Preserve Their Aspect Ratio
Notice that the image's aspect ratio is off; the width was automatically increased to match the heading above, while the height remained the same. Yuck. Let's explore an option for adjusting the picture display.
1. Notice the object's Format tab at the top. It's called Picture Format on Mac and Picture Tools > Format on Windows.
NOTE: Because the name for this tab is different on Mac and Windows, we'll refer to it as the (Picture) Format tab from now on.
2. In the (Picture) Format tab, click the arrow part of the Crop button and from the menu, choose Fit.
3. This makes the image appear at its original aspect ratio, as shown below:
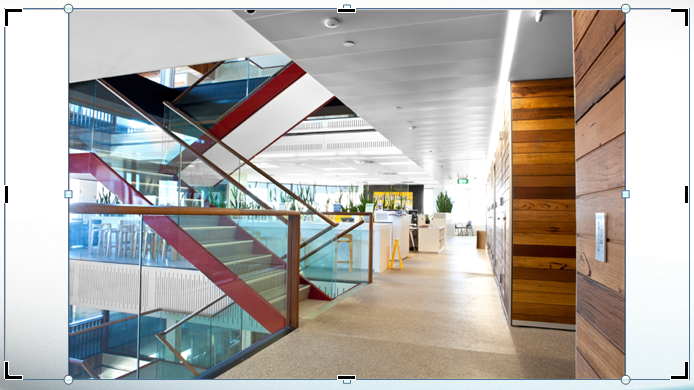
Photo courtesy of istockphoto, © ShutterWorx, Photo #21172829
4. Drag the image vertically and horizontally. Notice that the frame masks out any part of the image outside of it, as indicated in gray.
5. Undo any changes by pressing Cmd–Z (Mac) or Ctrl–Z (Windows) until the picture fits into the rectangle.
6. Hold Shift and drag the corner handles of the image to play around with its size (Holding Shift scales the image proportionally).

Photo courtesy of istockphoto, © ShutterWorx, Photo #21172829
7. Scale the image so that it is larger than the cropping area; as long as it's bigger than that, it'll fit within the dimensions of the original placeholder (as we want).
8. Drag the image around to find a framing you think looks good.
9. Deselect the picture by clicking on a blank area of the slide.
Creating a 2-Picture Slide
1. Next, we're going to create a 2-column picture slide. In the Home tab, click the arrow part of the New Slide button and choose Two Content.
2. In the title placeholder, type: Leaf Works Locations
3. In the center of the left content placeholder, click on the Pictures icon.
4. Double–click lobby-office-iStock-21172829-ShutterWorx.jpg.
5. Drag the top and bottom edges of the picture so it snaps to the orange guides, which match the frame on the right.
6. In the (Picture) Format tab, click the arrow part of the Crop button. Choose Fill. This makes sure the picture fills the frame while maintaining the correct aspect ratio.
To adjust the layout, drag the visible area of the image a little to the right, so more of the city buildings are showing.
7. Deselect the picture.
8. In the center of the right content placeholder, click on the Pictures icon.
9. Select interior-office-iStock-20537204-copyright-evirgen.jpg.
10. Drag the top and bottom edges of the picture so it snaps to the orange guides, which match the image on the left.
11. In the (Picture) Format tab, click the arrow part of the Crop button. Choose Fill.
12. To adjust the layout, drag the visible area of the image a little to the right. Refer to the screenshot below, or do whatever you think looks good.
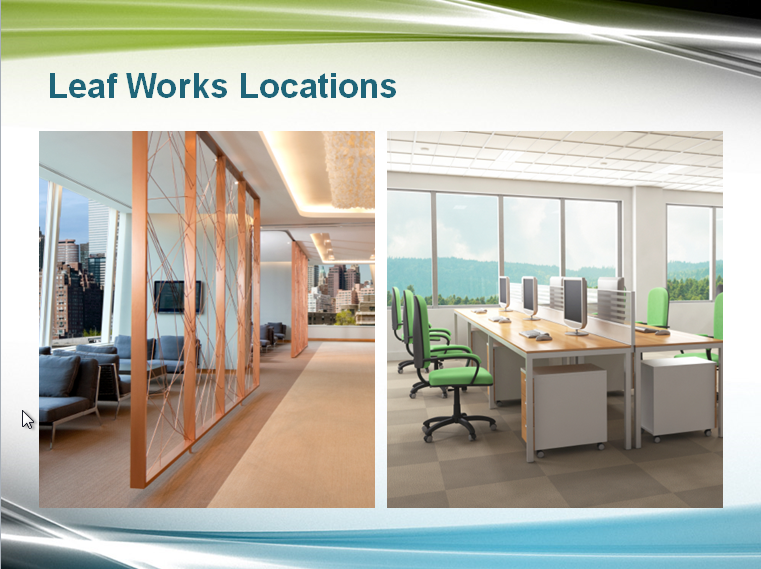
Photos courtesy of istockphoto, © Evirgen, Photo #20537204, © ShutterWorx, Photo #21172829
13. Click off of the picture onto a blank area of the slide to view your finished slide.
14. Quite picturesque! Save the file.
Master Microsoft Office
PowerPoint, along with other apps such as Excel, is an essential tool for anyone working in a business setting.
We offer the best Microsoft Office training in NYC. Top professionals guide students through step-by-step projects with real-world applications. Sign up individually, or contact us about corporate training today: