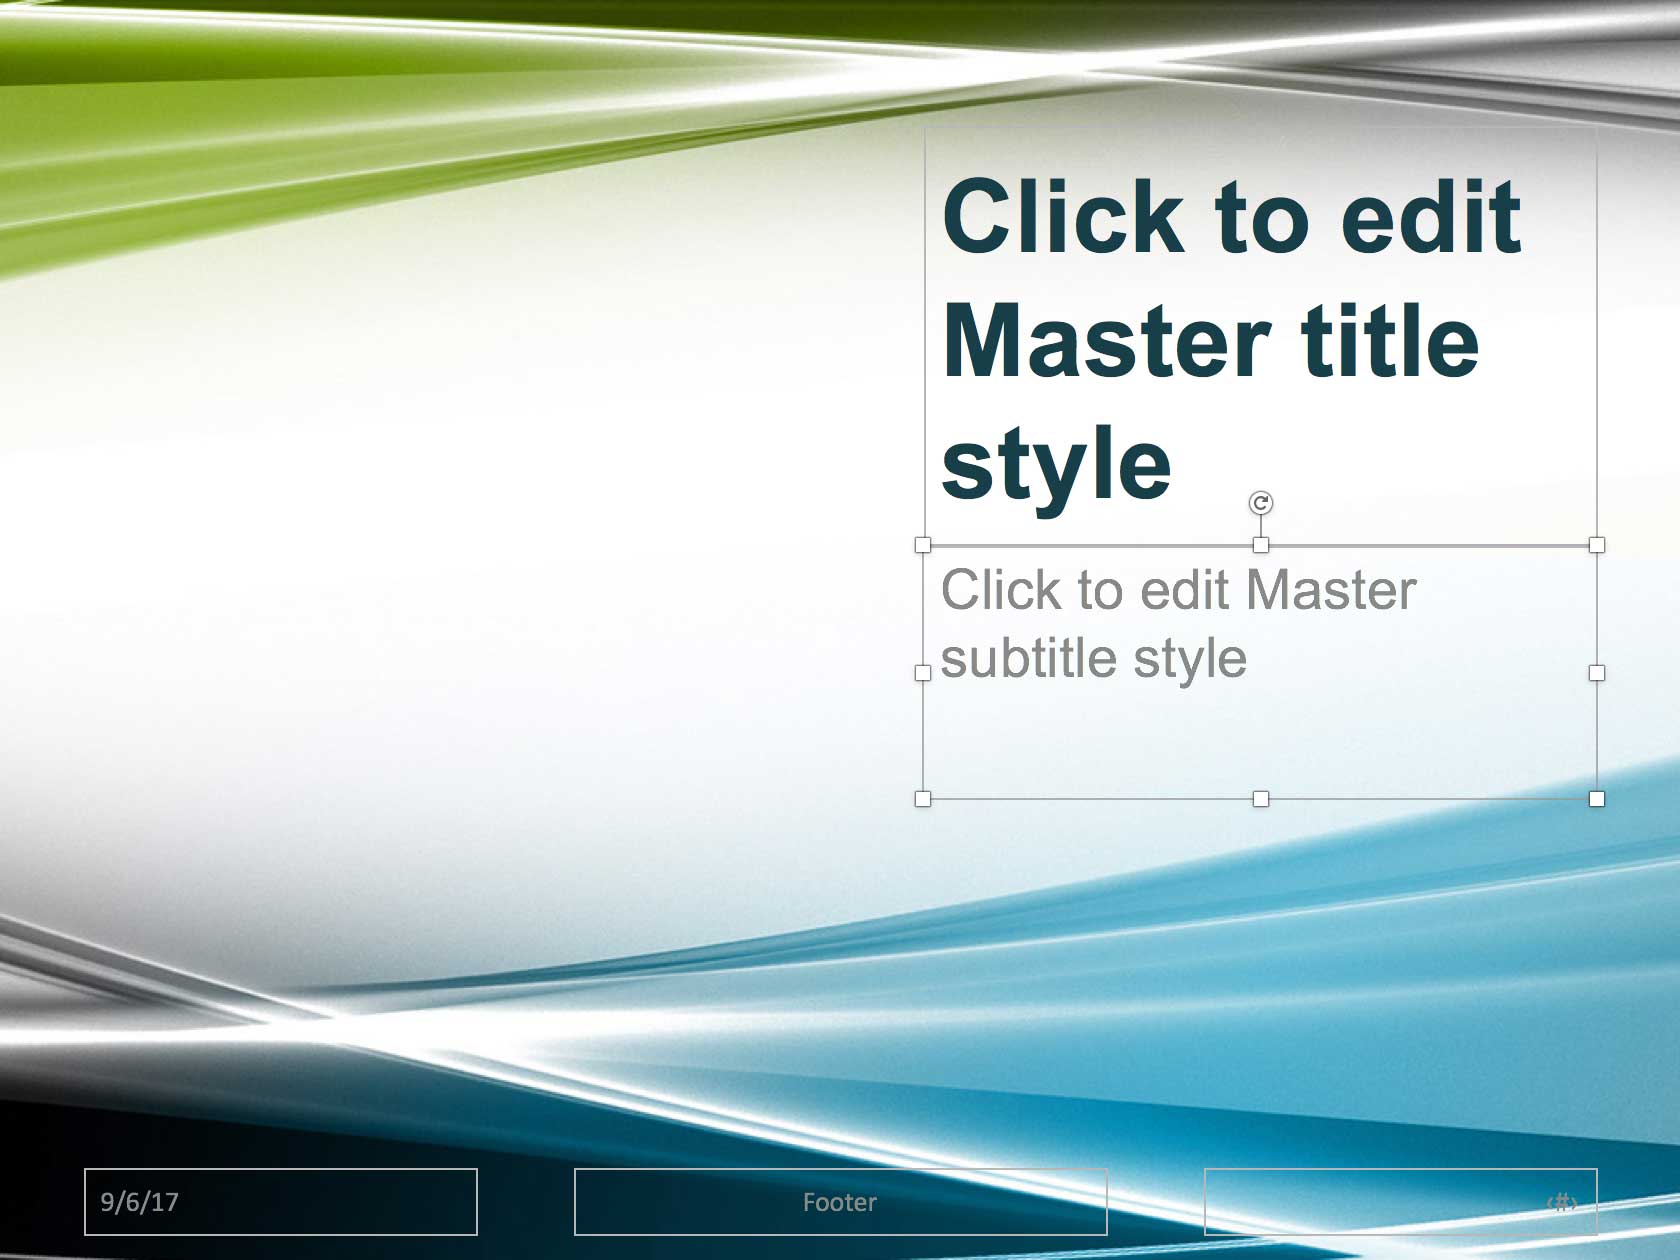
As you learned, the Slide Master acts as a default template for content slides. What about title slides? A title slide should have its own unique look. In this exercise, we'll edit the Title Master, which is typically only used as the first slide of any presentation. You'll also add the finishing touches to both the Slide Master and the Title Master.

Downloading & Installing Class Files
If you haven't done so already, these instructions tell you how to install the class files you'll need to go through the exercises in this workbook.
- Navigate to the Desktop.
- Create a new folder called Class Files (this is where you'll put the files after they have been downloaded).
- Go to nobledesktop.com/download
- Enter the code ppt16-1708-01
- If you haven't already, click Start Download.
- After the .zip file has finished downloading, be sure to unzip the file if it hasn't been done for you. You should end up with a PowerPoint 2016 Class folder.
- If you still have the downloaded .zip file, you can delete that. That's it! Enjoy.
Before Starting
1. If you completed the previous exercise, yourname-Presentation.pptx should still be open. If you closed it, re-open it now. If you did not complete the previous exercise (1B), do the following sidebar.
|
If You Did Not Do the Previous Exercise (1B) |
|---|
|
Formatting the Title Master
1. Click on the Slide Master tab if you're not already there.
2. In the Slides list, click on the Title Slide Layout (second slide from the top).
3. We want to put a logo on the left, move the title and subtitle to the right, and make them smaller. Normally, you would use your best judgment to position placeholders, but to make things easier, we've provided exact coordinates for you to use. Right–click on the title placeholder's bounding box and select Size and Position. The Format Shape panel will slide in on the right side of the screen.
4. Under Size, set the following:
- Height: 2.5"
- Width: 4"
5. Still in the Format Shape panel, farther down the screen, expand the Position options.
6. Set the following:
- Horizontal position: 5.5"
- Vertical position: 0.75"
7. Notice both From fields are set to Top Left Corner. That's where it measures the coordinates from. You could change that if you wanted, but no need here.
8. Now on to the subtitle. Click on its bounding box. You are now able to edit its properties in the Format Shape panel on the right.
(We recommend keeping the Format Shape panel open while you work. If you closed it, Right–click on the subtitle placeholder and select Size and Position.)
9. Under Size, set:
- Height: 1.5"
- Width: 4"
9. On the left, under the Position options, set the following:
- Horizontal position: 5.5"
- Vertical position: 3.25"
11. The subtitle is black by default, which detracts from the title. With the subtitle still selected, click on the Home tab.
12. Click the icon part of the Font Color button. Clicking the icon changed the selected text to the last used text color. Not what we want.
13. Click the arrow part of the Font Color button, and in the menu that appears, select the seventh theme color, Gray-50%, Accent 3 (top row, 7th swatch).
Cleaning Up the Slide Master
1. In the Slides list on the left, click on the Slide Master (top slide) to select it.
2. Notice at the bottom of the Slide Master, there are three placeholders included by default: date, footer, and slide number. Let's remove the date and footer.
NOTE: PowerPoint automatically populates the date field with the current date (marked mm/dd/yyyy), and the slide number field (marked <#>) with the appropriate page number. There is no need to type them in for each slide.
3. Click on the bounding box around the date placeholder to select it.
4. Shift-click on the footer placeholder's bounding box to select both.
5. Press Delete/Backspace to delete them.
6. Click on the remaining slide number placeholder's bounding box to select it. Let's format it so that it is visible against the background.
7. In the Home tab at the top, click the arrow part of the Font Color button to open the menu. Under Theme Colors, select the first one: White, Background 1.
9. Click the Bold button. Now the slide number is easier to see.
Cleaning Up the Title Master
1. In the Slides list on the left, click on the Title Slide Layout.
We don't want it to count as Slide 1. So let's remove all three default elements (including the slide number) from the bottom of the Title Slide Layout.
2. Shift-click on the bounding boxes of the date, footer, and slide number placeholders. Press Delete/Backspace to delete them.
4. The master slides are ready to rock! Save the file.
Master Microsoft Office
We offer the best Microsoft Office training in NYC. Learn how to create engaging presentations, generate reports on the fly, automate tasks, and more! Our expert instructors guide students of all levels through step-by-step projects with real-world applications. Sign up individually, or contact us about corporate training today: